
Last year I had a lot of inquires about the packaging sleeves on my DVDs and where I get them from.
So – here’s the kicker – I’m a total paper and textile junkie and I actually hand make every single one of them, custom, for each and every client. When I started making these about 3 years ago it was a little time consuming, but once I finalized my pattern, I could actually make one from start to finish in about 5 minutes. Although I have recently upgraded to custom USB flash drives and PASS instead for image delivery, there are still many who wanted to learn to apply this pattern in other kinds of paper crafts or packaging ideas such as accordion mini books (see bottom). I have really loved making these for my clients. Hand selecting each paper and coordinating each ribbon and embellishments to match the session and client was always a fun craft project for me. It also meant a lot to me that my packaging, along with my images, was a complete custom boutique experience for my clients. I hope this inspires you to create something new and handmade.
STEP BY STEP PICTORIAL:
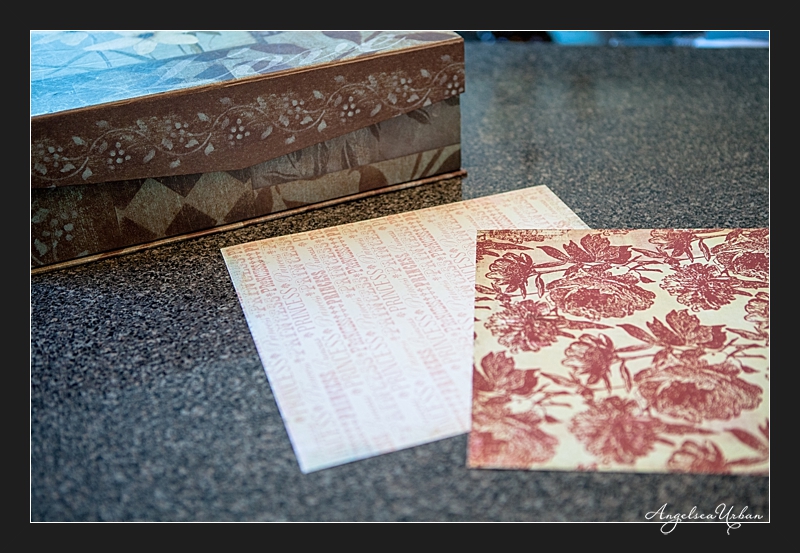
To create a custom DVD/CD Envelope start with regular 12×12 Scrapbook Paper (double sided works great too, but stay away from the cardboard stock kind – it gets too thick and doesn’t crease well).
Find center of paper and create an X lightly in pencil, then using the clear case as a guide find 5” from bottom corner and crease upwards aligning the corner with the center line

Reinsert the case, find and crease the 2nd line, then remove case to permanently crease with tool. (I finally bought a little Martha Stewart creaser tool because I was making LOADS of these sleeves and it really did help make the process go faster. In the beginning I just used something like a marker or butter knife.)
Repeat this process for both sides.
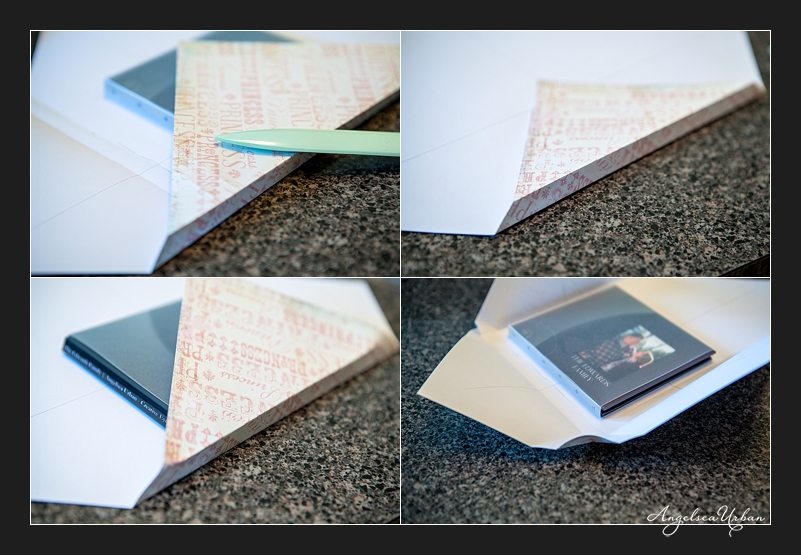
Using an xacto knife cut out the corners (I’ve marked in pencil to demonstrate). Also a handy little Martha Stewart tool from the scrapbook supply store such as Michaels or A.C. Moore.
![]()
Next, mark, crease and fold the top down
Tuck inside & under the excess that meets the bottom of the jacket
With crease tool, refold sides in to reinforce final crease so you get nice clean sides
![]()
Reinsert case for final test fit, checking all corners and making and adjustments.
![]()
Mark a crease for the thumb opening on each side. Then open jacket to make that crease. Repeat for other side.
![]()
Final test fit before gluing. Then open up and glue in spots indicated.
![]()
Reinsert case for final glue and fitting. Glue corners, being mindful of their alignment. (The glue used is also from scrapbook section of any discount supply store or even Walmart or Staples. Any double sided “goo” will work just fine. As long as it is not a wet glue and doesn’t need time to dry.)
![]()
And THAT’S IT! ALL DONE! Now if you are using double sided paper, the inside will look just as beautiful as the outside. This was all done using (one) 1 sheet of 12×12 scrapbook paper.
![]()
If you are not using a double sided paper, and you don’t like the look of the inside of your sleeve, you can use a second sheet to cover the inside. Either in a duplicate of the same pattern, or a coordinating sheet.
Cut out an inside cover using another piece of matching or coordinating paper slightly smaller than final product. Apply glue on all sides and slide in to secure carefully. Then all set and ready to decorate.
![]()
Depending on the pattern, the color of the paper, the style of the paper, the session, the client, their decor and taste, will all determine what I do with the sleeves. As a custom handmade gift to them, this part is less about my “branding” or marketing and more about making them something that is special just for them, with THEM in mind. My “branding” is already in the boutique experience with custom lifestyle photography and with receiving a handmade custom sleeve. The look of the sleeve is all about the client.
![]()
Here are a few ideas of the same pattern with a single 12×12 sheet of scrapbook paper:
![]()
![]()
![]()
![]()
![]()
The only part of the ribbon (on the front) that is glued or double sided tape if the ribbon is wide enough, is the small section in the middle. I flip it over (picture on bottom right) and use that as a holder to insert a thank you card, print care card, and license. The whole thing then gets wrapped up and sealed with tissue and stickers.
![]()
The bottom two images show custom 3×3 accordion mini’s books made the same exact way. For these, I use the same 12×12 sheet cut in half diagonally, and you can make 2 sleeves from one 12×12 sheet. Otherwise, the pattern is exactly the same. You will just need to clip off some excess on the sides, which will be obvious when you try to fold it together.
![]()
![]()
I hope you found this post helpful and please feel free to message me any questions you have or PLEASE post a link to a picture if you make one. I’d LOVE to see it!
HAPPY NEW YEAR! 🙂
XOXO,
![]()
.jpg)


Katie Yuen - Wow those are BEAUTIFUL Angie! You are so creative!!!!