Calling all DIY lovers, Trading Spaces Fans, pseudo moonlighting interior designers and dreamers of workspace makeovers: pull up a chair! I bring you the last 5 months of my life! ha! Actually it only took 30 days, but then it became functional, so like everything else – who needs the last 10% to be done right?
Well I finally stopped everything and got to about 98% completion so I could finally take some photos to share. Someday, I’ll learn to sew, and then I can be 100%, which I’ll explain later in the post. In the meantime, welcome to Urban Studios (there’s an (s) because Steve took over my old office across the hall and is turning it into a man cave/music studio).
We live in a suburban colonial style home built in 2006. The floor plans for this particular house sold us because there was an office located on the first floor just off the foyer (it was nice not to have to use a converted bedroom like our old house) and that was a huge feature since I meet with lots of clients in my home office. That office served us well for 5 years until we grew out of it and Sonya, Caity, Steve and I grew tired of bumping elbows in trying to get work done or attempt to be organized.
Across the foyer was the typical formal living room/dining room combo. We had a couch in there set up to look like a living room, but it became a catch all for everything that didn’t have a home and no one ever actually sat on it. I finally turned that into a make shift studio, but it too was small and trying to set up a soft box with everything else in there was difficult. The adjoining “dining room” was never a dining room. From the day we moved in, it was a play room. Holding all of the toys and kid stuff from creeping it’s way all over the house. This too, also didn’t last. The toys always ended up in the kitchen, family room, or everywhere else all over the house. When my son turned 5, it was time to move him into a “big boy” room, and all of his toys moved with him.
I took over the living room/dining room combo and turned it into a client meeting area, office, production space, and shooting studio. YAAY!
AND – it all happened for less than $1,000 bucks with some paint, some DIY tricks, and up-cycled finds from yard sales and flea markets. And lots and lots of elbow grease from Caity and Steve and me. Thank you Caity – a million times, thank you. This would not have come together without you! And Steve had some pretty brilliant ideas about the floor, the sliding doors and some other tricks. It was a real group effort!
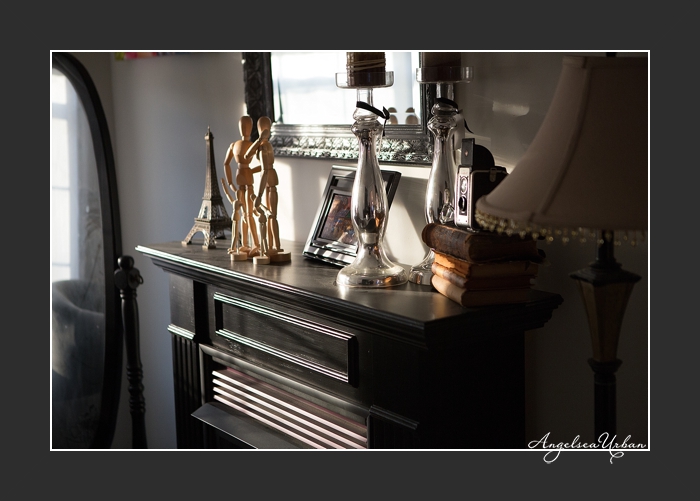
Everything here was collected from other parts of the house. Except for the posing people, because they were on sale at Barnes & Noble and let’s face it – you NEED to have some posing people family on a mantle.
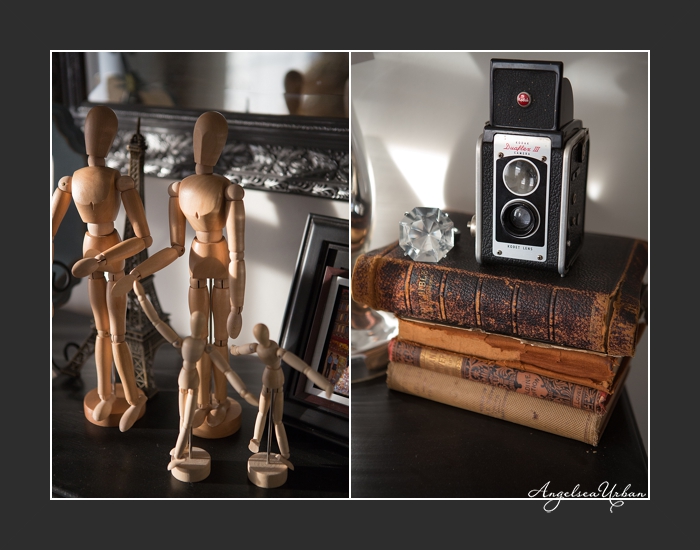
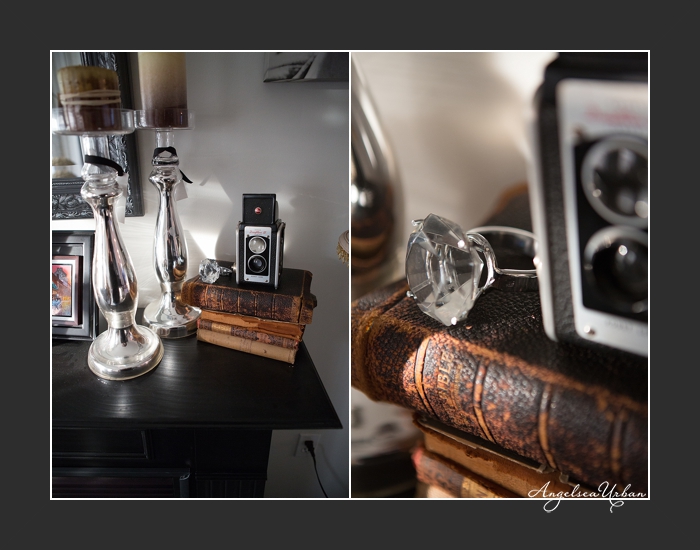
The giant silver candle holders were on sale at my local SUPERMARKET for $2.99! And the funky giant diamond ring was found at the Christmas Tree shops.
The armoire here has been in our family for almost 20 years when Steve found it on the road when trying to furnish our first apartment many moons ago. This is its second makeover and probably a piece we’ll keep for life because of its super powers. Yes, I said this armoire has super powers. Ask anyone we know and they will testify about how this armoire has fixed VCRs, cordless phones, DVD players and many other random electronics. I’m not kidding. It fixes electronics. For real. It is now our production station. It holds all of the packaging supplies, boxes, ribbons, stickers, business cards, thank you cards, scissors, office supplies, scrapbook paper, tissue paper, bubble wrap, packaging tape – everything. Everything needed to make client packages pretty. Some newborn props are stored on top and we actually drilled some plant hangars on the side to hold some camera and laptop bags.

The inside of the armoire. I got a little excited about the chalkboard paint and decided to paint the inside of the doors to hold daily to-do lists. Or Greyson’s latest airplane chalk drawings. Or surprise notes to the kids.

I get LOTS of questions on my “custom laptop cover”. The laptop has a clear cover on it. I printed out – on a plain piece a white printer paper this graphic with my logo on it and slipped it in between the cover. For wedding slideshows, in the darkened reception halls, it actually lights up through the white letters. Pretty cool for the cost of a piece of paper. That’s it. Super easy. On the right was a DIY gift from my talented dear friend Kacey – yes, that is Steve and me in a wedding photobooth. Photographers get goofy at the end of a long day what can I say!

Refurbished mirror. It was that cheap looking brown oak found at a yard sale and sat in my garage for my “future studio”. Glad it was finally able to get a place. (Yes, it has been cleaned since – this was only at 98% remember).

So – EVERYTHING in the studio – EVERYTHING – from the desk to the couch to the chairs and tables are on CASTORS so they can move around the entire space easily to set up for shoots. The house faces west and the back window (in the left of this picture) faces east. So on days when I’m shooting with natural light only, I would be in either the front or the back depending on time of day and all of the furniture can roll over in about a minute. The rest of the time I would be able to use studio lighting anytime.
This desk below is from Walmart and cost only $39 bucks. It’s 2 desks together. When I am working alone, it looks like this. When Caity comes in to work, it gets split into two desks so she has her own space.


Martha Steward Chalkboard labels ^^^ LOVE them! What the desk looks like split (below).

I don’t have much on the walls on this side since this is primarily used for shooting. This giant butterfly sculpture is mounted above the door so I don’t have to ever worry about it being in the background.

I’m a huge fan of Alton Brown’s show “Good Eats”. Each episode he would insist that every item in your kitchen serves at least 2 purposes and if not, it doesn’t get to live in your kitchen. I try to adopt that rule with things that live in the studio. So these boxes are shipping boxes that go out for client gifts filled with goodies. BUT before they are used for shipping boxes, they also hold supplies such as gift certificates, and said client goodies which will be unnamed to not spoil surprises.When they go on sales at Michael’s, I stock up and this becomes a giant tower of boxes.

See that awful non slip cover- slip cover on my couch? Meet my 2% – Anybody know how to sew one? Contact me please! I’m serious – it may never, ever get done. Salvaged chair below was rescued from imminent death. It sat in my basement for years waiting for a home. Caity claimed it as her office chair. I think it suits her (and the space) just fine.

Children’s bench on the left was made from a converted twin headboard and footboard. There is storage inside the bench. Yard sale find, painted. On the right is my most favorite thing – no not the bear – the chalkboard wall! (Although he’s kinda cute too). It’s for shooting against as a background, but when not in use it occupies the kids, (or me) or serves as a giant production board when we have a TON of orders in process for quick reference. This was especially helpful during our Christmas rush.

Client Cafe/production table/fill out contracts table/breakfast nook. On the table is an Organic Bloom iPad frame mainly used to display slideshows at weddings. When not in use for weddings, I painted some leftover chalkboard paint on a piece of cardboard. Inserted into frame and now it’s a sign. (I’m lucky I ran out of the chalkboard paint – I was starting to paint everything in sight). It was our advent calendar during Christmas time. The kids would erase and countdown all of the days until Christmas. Now….life’s pondering question: What is YOUR story?

The coffee bar. My other favorite part. Able to serve coffee, hot chocolate, lattes, cappuccinos, teas, espressos, and Americanos daily. The curtain behind it covers the existing banister that leads into the foyer.

Sometimes we just open up the jar of beans and smell them. It’s heavenly. 😀

Another rescued piece is this detailed hutch that a friend was tossing. I saved it with the intention on refinishing it. For 5 years it was unfinished holding my children’s books in the playroom. They didn’t seem to mind, but it needed some DIY love to be a featured piece in the studio. White paint with a little charcoal paint on a dry foam brush for the accents. It holds the equipment that doesn’t permanently live in my Think Tank Bag, along with other ugly supplies that live in cloth bins (from a sale at Big lots). This hutch still needs the small chicken wire installed in the front (also part of the 2%).


Why, yes, of course, it IS a teeny tiny mini camera and accessories! Thank you Photojojo.


The western side mainly used for client meetings and lifestyle sessions. The fireplace is not hooked up as it is also on casters to be rolled around. BUT it looks pretty with stuff on it, so we painted it and put it in here – it was also a yard sale find.

My OTHER 2% – again with the sewing! That ottoman is waiting for its matching slipcover to go with the couch. Anyone?


Afraid of scratching up beautiful dark hard wood floors needed for shoots (as we rolled around all of this furniture constantly), Steve came up with the brilliant idea of just taking up the carpet and painting the floor. The plywood subfloor. It was a $35 bucket of floor/porch paint. I absolutely love the way it turned out and love that it is nice and bright. I mainly wanted the dark wood for shoots, which I found a solution for later on (you’ll see that pic later in the post). Thanks to pinterest, I saw this idea for a teeny little detail in the corners and around the edges. I would never have thought to just paint the plywood floors. Never. Such a great idea! And I love the idea of a rustic non perfect looking floor to tone down the other formal items. Now when (not if) the floor gets scratched – I can easily slap on some paint.
Since I try to stick to Alton’s rule – the curtain rod that hides the banister also doubles as a paper background stand. It’s 2 wooden curtain brackets with a 9 foot closet pole in between the two. Strong enough for the heavy drapes, and a full 8 foot roll of seamless paper.

Who knew it was so easy to MAKE a lamp? I didn’t. But my friend Melissa did! I learned that with a $15 kit, I could make the exact pendant lamp I needed for a fraction of the cost. Thank you to the nice lady at Lowes who showed me what I needed and my bestie who told me how easy it was.
On the right is my solution to NOT having a hard wood floor throughout the studio. Hardwood snap together floor that can be easily assembled and taken down after a shoot. Cost was only $35 verses $2,000 to do the entire floor. (And then there was the scratching issue). I loved this solution. And it opened up the opportunity for me to get a variety of them at only $35 each. The beadboard was $10 and the extra moulding was $7. It just provides lots of background options without having to use a fake rolled up background that is pretending to be a hardwood floor and beadboard background. 
The coffee table/chest on the office side doubles as a tripod, monopod, lightstand and reflector holder. The end table doubles as a newborn prop closet.

Some before and after side by side shots.


Taking down and re-hanging the light fixture was fun. Steve’s instructions via speakerphone: “Just put white to white and black to black”. Me: “ahhh ummmm……I have copper and silver?”
Hmm…..Well – we took a guess and I lived to tell about it. Score!


All of this for under $1000 – Trading Spaces style! About $400 in paint alone and the rest was spent on curtains, electrical, and all of the small things that add up like castors and new light bulbs. Those things added up quick!
The majority of all of this was done by 2 girls and in about 30 days.
Hope you enjoy!
XOXO,
Angie


.jpg)



















Anonymous - absolutely gorgeous ang!
Angelsea Urban - Aww…thanks Melissa! The piano is now in the new man cave/music room – aka my old office.
Melissa Drew - So very cool! I always knew you had such an eye for things 🙂 But where’s the piano?
Leslie Cox - Beautiful
Steve Urban - The studio space came out beautifully, and I am very thankful Angie now has a professional space to work in/from!
Sknow Design Photography - loved this! I am redoing my (much much more tiny) studio/office today and tomorrow, so this was awesome inspiration!
Alicia Candelora - LOVE IT!
Kristin Layne Peddicord - It’s gorgeous! Congrats!